By Charlotte Lowrie
 Whether the Canon 5D Mark III is your first Canon digital SLR or you’re upgrading from the 5D Mark II, you will be delighted with the large and small features tucked into every nook and cranny of this camera. The changes start at the top with a locking Mode dial and the new Creative Photo button, and continue through the extensive system of revamped and redesigned camera menus. There is something to discover literally everywhere, it seems. If you’re like me, then you will spend the first few weeks with the 5D Mark III discovering all the new options and features..
One of the new and most impressive upgrades is the completely revamped autofocus system. This systems stands on the shoulders of the Canon 7D’s autofocus system and builds on it. There is ample opportunity for photographers to tweak focus, particularly when using AI Servo AF to track focus on subjects. While I can’t say that the new focusing adjustments are “easy to use,” but I was pleasantly surprised to see that Canon simplified things by creating six preset “Cases” that are designed for different types of action subjects and subject movement. The cases provide a good starting point for setting up AI Servo AF to be more responsive and accurate. Regardless of the AF mode, there is a lot of power under the hood of the new system, and it just takes time and experimentation to find the combination that works best for the subjects that you photograph most often.
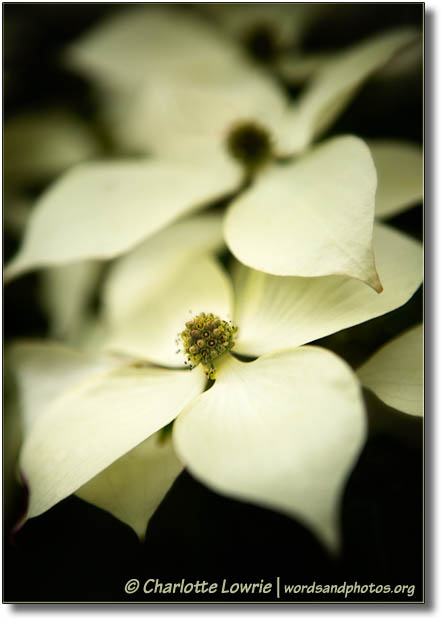
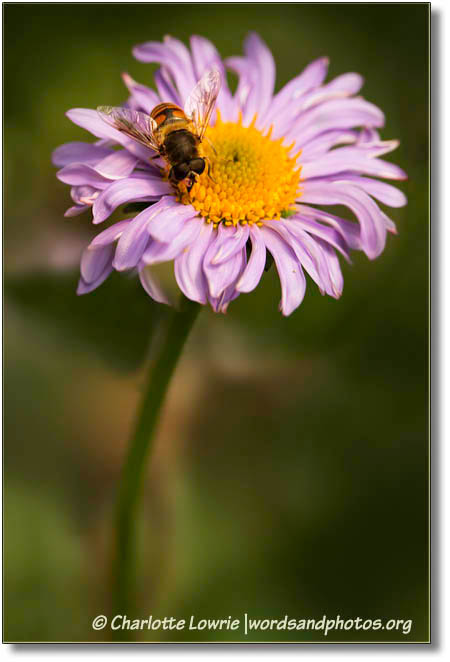
Most of the new images you’ve seen on this Web site are made with the 5D Mark III. My most recent shooting has been nature and still-life subjects, and the camera is enjoyable to use. It also offers improved low-light/high ISO performance, but the best way to avoid overly aggressive noise reduction is to shoot RAW files and process them yourself applying a bit of sharpening improves detail through the image and particularly in low-contrast areas of the image. At high ISO settings, I recommend setting Noise Reduction (NR) to the Standard setting. Canon applies some behind the scenes, so this lower level of NR doesn’t mean that no in-camera NR is being applied. Rather, it means that the image will not have too much NR applied in-camera, and that you can adjust the NR yourself during RAW-image conversion.
Here are some of my favorite features and recommendations for using the 5D Mark III.
-
 Customize the camera to suit your shooting style. There are opportunities to customize the camera throughout the camera menus, but the two primary customization options are the Custom Controls screen found on the Custom Functions 2 camera menu, and My Menu where you can set six of your most frequently used menu items for easy access. And if you’re a back-button focus fan, then the Custom Controls screen is where you can set up back-button focusing.
- Setup the Custom (C) modes for specific venues. One of the best features for saving you time is in setting up the three Custom modes--C1, C2, and C3. Virtually all the camera settings can be registered to the C modes. And with the 5D Mark III, the changes in settings that you make on the fly are retained even if the camera goes into sleep mode. I have each of the C modes on my camera set for specific venues: C1 is setup for shooting in my studio; C2 is setup for outdoor portraits, and C3 is setup for concerts on stage at my church. Thus I can move from one venue to the other knowing that the exposure mode, ISO, starting aperture or shutter speed, white balance, Picture Style, and other camera settings are set and ready for shooting.
- Customize file names. For the first time on an EOS camera, you can choose the first four characters of image file names. Alternatively, you can customize the first three characters, and have the camera automatically show the image size with the fourth character. Since this is relatively easy to do, you could set filename to identify a shoot. For example, if you’re shooting the Smith wedding, the filenames could be Smth0001.CR2. Or if you want the image size character, it would become SmtL001.JPEG with the L indicating full resolution image size for both JPEG and RAW, though the filename extension, of course, changes to CR2 for RAW files. Or in a multi-photographer studio, you could set the filename to identify the photographer using the camera. To customize file names, go to the Setup 1 menu, choose File name, and then choose Change User setting 1 to set the first 4 characters, or choose Change User setting 2 to include the image size.
- Use the cross-type sensors to your advantage. The new 61-point autofocus system offers a central bank of 21 AF points that are cross-type sensors for lenses with a maximum aperture of f/5.6 and faster for increased focus sensitivity. With these sensors there is an added bonus of the camera more readily detecting extreme defocus and correcting it faster than before. The cross-type sensors offer excellent performance in low-light focusing. In fact, Canon representatives say the camera can focus with nothing more than the light of a full moon. To ensure that you take advantage of the cross-type sensors that are available with the lens you’re using, set the camera to display only cross-type AF points in the viewfinder. Just go to the AF 4 menu, select Selectable AF point, and then choose Only cross-type AF points. That also eliminates the annoying blinking of non-cross-type AF points that happens in other AF point views.
- Shoot silently—or nearly silently. If you’re shooting weddings, news events, or any event where quiet is prized, then you know that the noise of High-speed continuous shooting is often too intrusive for some or all segments of the event. Now you can use Silent continuous shooting for much quieter camera operation. The downside of quiet shooting is that the frame rate is reduced from 6 frames per second (fps) to 3 fps. To set Silent continuous shooting, just press the Q button, tilt the Multi-controller to select the drive mode, and then turn the Quick Control dial until Silent continuous shoot. is displayed.
-
Best color for movies. If you want better and more consistent color for movies, then set a Custom White Balance or use one of the preset White Balance options instead of using Auto White Balance. This also makes editing
the movie easier.
- Keep things square with the Electronic level. You likely already know how handy the Electronic level is for squaring up vertical and horizontal lines in a scene. But it becomes a must-use accessory in low-light scenes when it’s almost impossible to visually see reference points for lining up the camera.
 Also be sure to check out my book, the Canon EOS 5D Mark III Digital Field Guide
 .
.
Related articles:
Related online course:
RAW Shooting: From Capture to Finished Photo
